No products in the cart.
snapper snatchers
The Best Port Phillip Bay Snapper Rig For Season 2018 Reds Melbourne Video Spring
Snapper Rig How to Tie Your Fishing Rigs Step By Step
Hey! I hope you enjoyed watching this video: Snapper Rigs How to Tie Your Fishing Rig Step by Step.
The video was shot with a high-definition 4K camera and it is targeted at complete newbies to recreational fishing. But even if you are an experienced pro, you should have a look as I’m sure you’ll learn something new, a tip or a trick that you hadn’t thought of before.
With the 2018 Snapper Season in Australia very much underway, I strongly suggest that you watch the video and follow the instructions are carefully as possible.
I have discussed everything you need to know about tying and hooking a snapper fishing rig using Uni Knot Snell Hooks. I have also talked about tying Flasher Rigs, a different type of fishing rig called as Paternoster Dropper Rig.
About the Snapper Rig
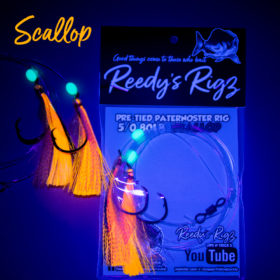
I suggest using the special Reedy’s Rigz Snapper Rig every time you go out snapper fishing this spring or winter. As you can see from the video, we have been able to get excellent results from Snapper Fishing at the Port Phillip Bay, St Vincent Gulf in South Australia over here in Western Australia.
This fishing rig is perfect for snapper fishing at any of the Australian Bays such as the Melbourne Port and Port Phillip Bay during Spring Snapper Season; Brisbane Offshore Coastline and Morton Bay in Queensland during the Winter Snapper Season, and the Perth Western Australia Reds for pretty much throughout the year.
Materials Used to Make the Snapper Rig
I use the following materials to make the Snapper Snatchers Rig: 60lb Jinkai Leader; Size 1 Ball Sinker Mustard Big Red Suicide Hooks; and some Lumo beads that I picked up from the Snapper fishing tackle made by Reedy’s Rigz.
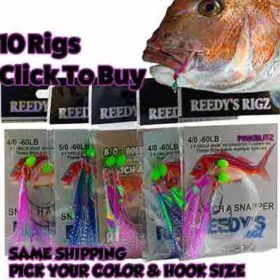
Buy These New Ultra Rigs By Reedy’s Pre Tied
My Favorite Knot
I suggest using the Uni Knot as it is the best way to bait a pilchard for the snapper. The Snelled part of your Rig gives the pilchard excellent protection.
A Quick Guide to Tying the Uni Knot
The Uni Knot is also called as the Grinner Knot. It is one of the easiest knots to tie. I have given an easy step by step guide to tying a snapper rig in a Uni Knot in this video.
Many anglers find this knot easier to tie compared to improved clinch and other more complex knots. Also, this is far more reliable and dependable. The Uni Knot is one of the 12 great fishing knots that any experienced fishing enthusiast would know about.
Here’s how it works.
Step #1: Run line through the hook’s eye, and double back along the standing line in parallel. Now, lay the tag end over the doubled line to make a loop.
Step #2: Make six turns with the tag end. This should go through the loop and around the double line.
Step #3: Hold the lines under water for a bit just so that you can moisten it. Then pull the tag end up to force the turns up.
Step #4: Right, you’re almost done. Now slide the knot down till you reach the eye so that it makes a small loop.
That’s it, that’s your Uni Knot. You can now hook the snapper rig to the Uni Knot Snell Hooks and you’re good to go!
10 Snapper Rigs By Reedy’s Pre Tied